

Storeyfy’s Image Interaction Plugin is a powerful tool that lets you easily create stunning presentations for an Architectural practice, a real estate or a construction company.
In this article we will take you step by step over the process of creating the following interactive image:
The main image is the building itself and clicking on a floor takes you to a floor plan. It has a menu on the side, which displays the objects from the currently visible image.
Let’s get started!
Creating a new project
Start by clicking New from the sidebar on the left. Enter a name for your new project, select Blank template and click Create.

Adding the main image
First we need to setup our artboards. In Image Interaction Plugin every layer, or “floor” is an Artboard.
When we created our new project there is already a default artboard, called “Artboard”. You can see it in the object list on the left:
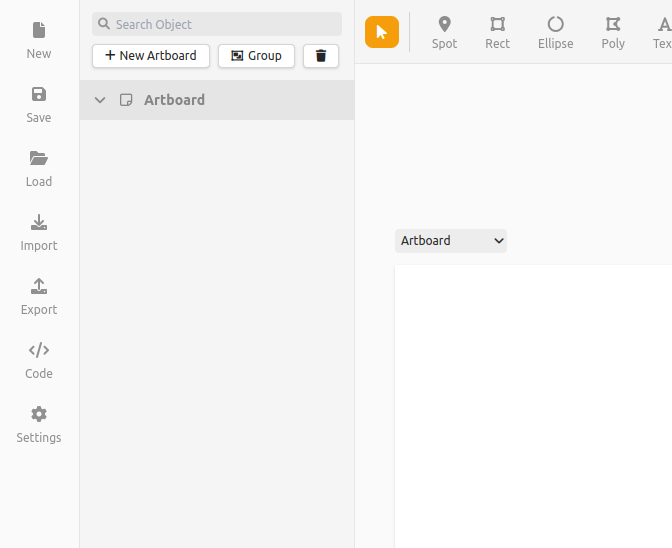
Left-click to select it and its settings will appear on the right:

Change the title to something that makes sense, for example “Overview”. Next, under Background select Image and either choose an image from the WordPress Media Library, or enter an URL, depending on which version of Image Interaction Plugin you are using.
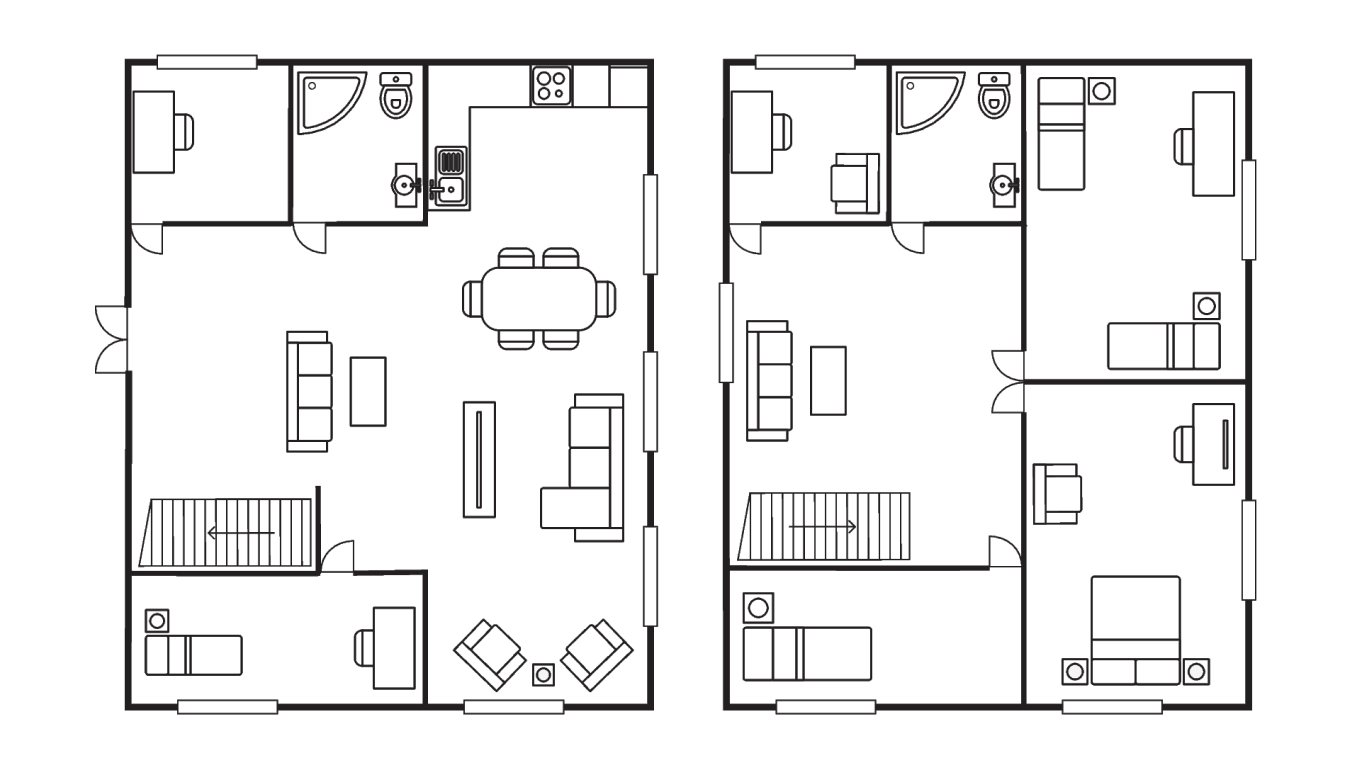
This is the image from the example in the beginning of this article, see below:

Every artboard has its own size, and by default it’s 848×480 px. We want to use the size of the image, so check “Use Background Image Size” after you have specified an image.
Hit Save. (Dont forget to do this at every step of the way to ensure you don’t loose any work)
Creating artboards for each floor
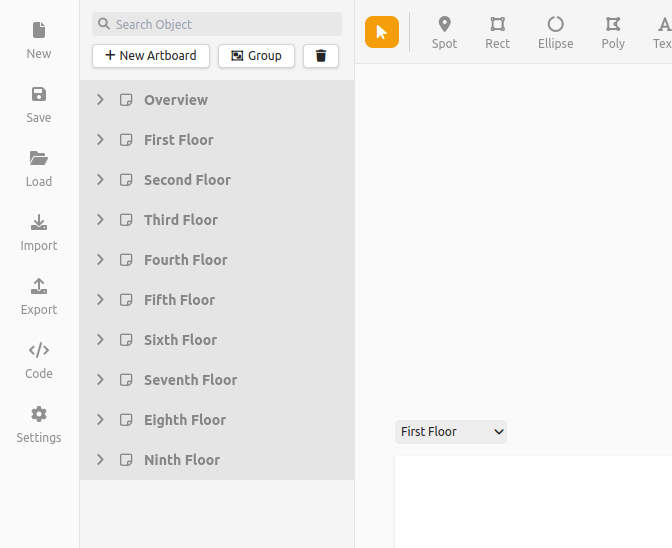
After we have our main image, it’s time to create the floors. Above the object list on the left, click New Artboard. Select it, change its title and add the floor plan image and repeat for each floor. You can use your own floor plans for each floor (artboard) and rename them in order accordingly.
Hit Save.
Creating the objects
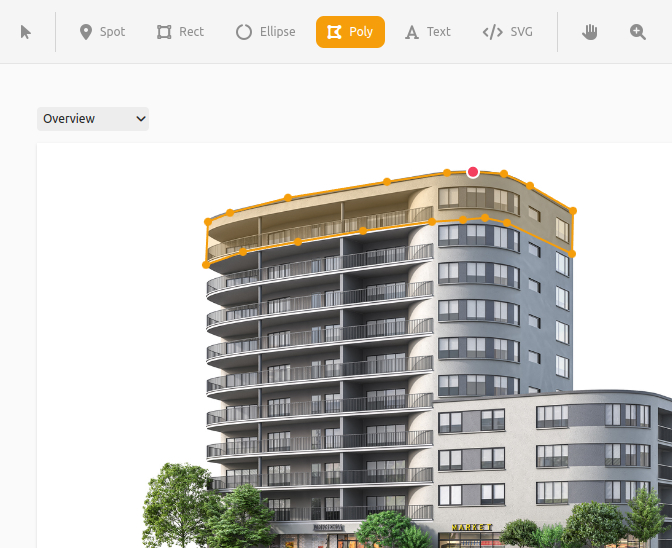
The process of drawing polygon shapes is very similar to other vector programs like Sketch or Figma. Make sure you are on the Overview artboard, by selecting it from the menu above the canvas:

Click the Poly tool or press P and draw a polygon around a floor. To finish creating the polygon, press ENTER or click the first point highlighted in red:
Repeat this process for each floor of the building.
At any point you can click Preview on the top right to see how your interactive image will look like.
Hit Save.
Changing object styles
After we have created a polygon object for each floor, it’s time to change their colors to better match the design of our website. Select any of the polygons and on the right you will see two groups of settings – Default Style and Mouseover Style:
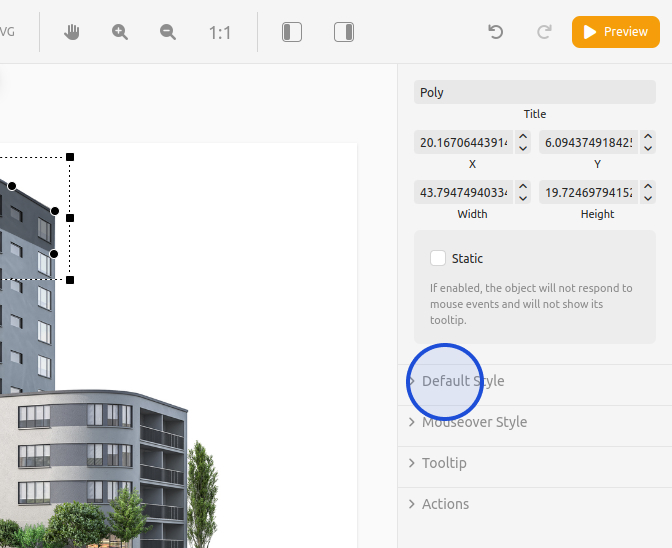
Open the Default Style category and set the Background Opacity to zero. Next, open the Mouseover Styles and set the background color to 28/100/242 or #1C64F2. At any point you can click Preview to view the changes in real time, or you can click Display in Editor under the Mouseover Style category title to see how the mouseover styles look.
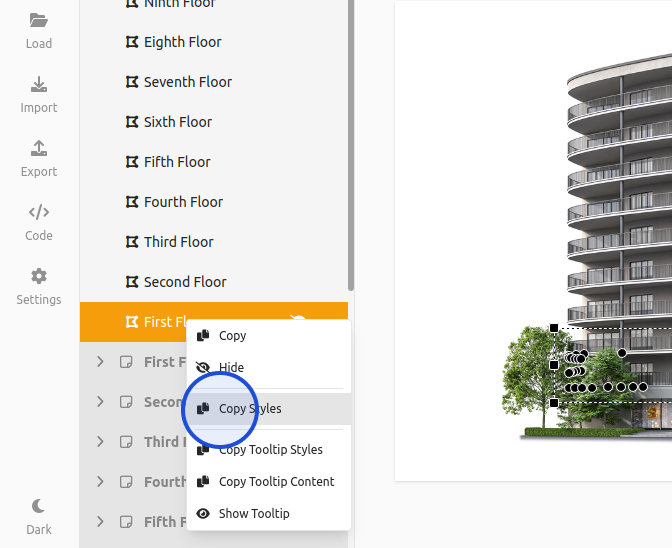
When you are happy with the styles of the object, right click it in the menu on the left and click Copy Styles:
Now, select all objects (click the first object, hold down SHIFT and click the last object, or select them one by one by holding down CTRL/CMD), right click and choose Paste Styles.
Hit Save.
Adding tooltips
We are done with the styling, now let’s add some annotations or tooltips to each object.
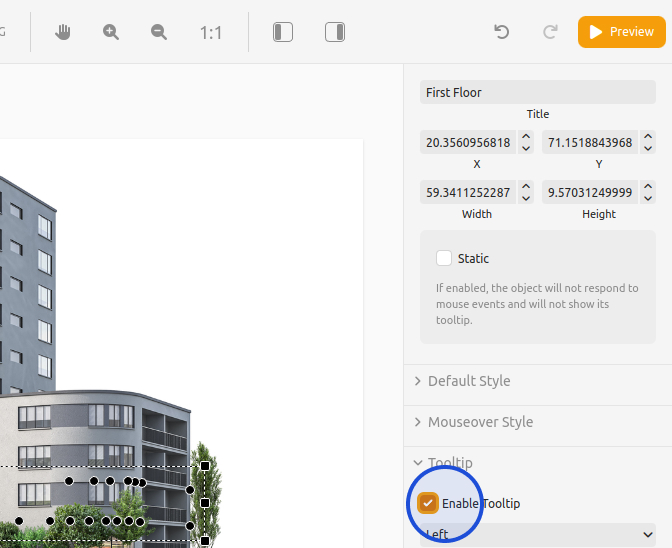
Start by selecting an object and make sure that its tooltip is enabled in the Tooltip category in the object settings:
Make sure Preview mode is disabled and you should see the tooltip just above the object:
Hit Save.
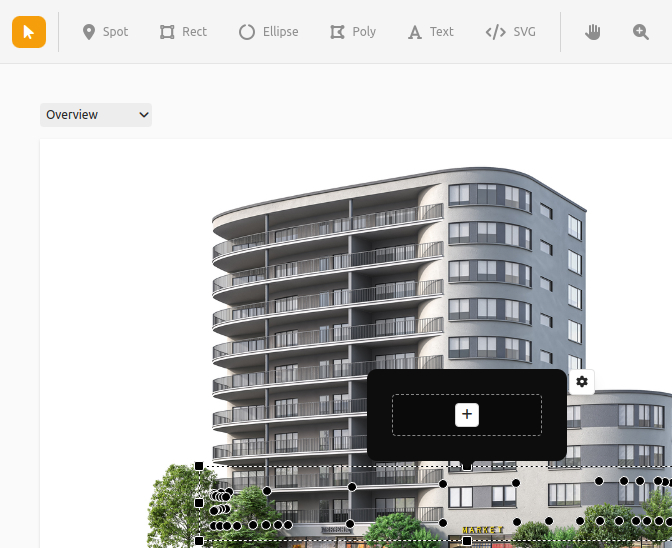
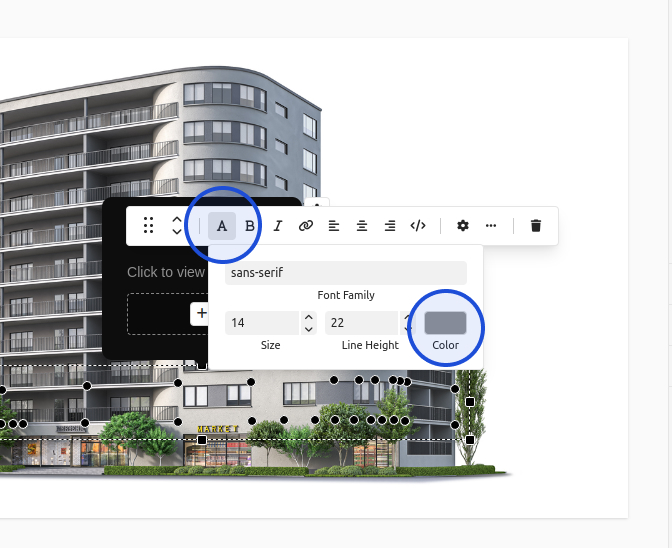
Click the “+” button and add a Heading. Enter some text, for example “First Floor”. Then add a paragraph and enter “Click to view floor plan”. With the paragraph block selected, click the “A” button in the toolbar above it and set its color to gray:
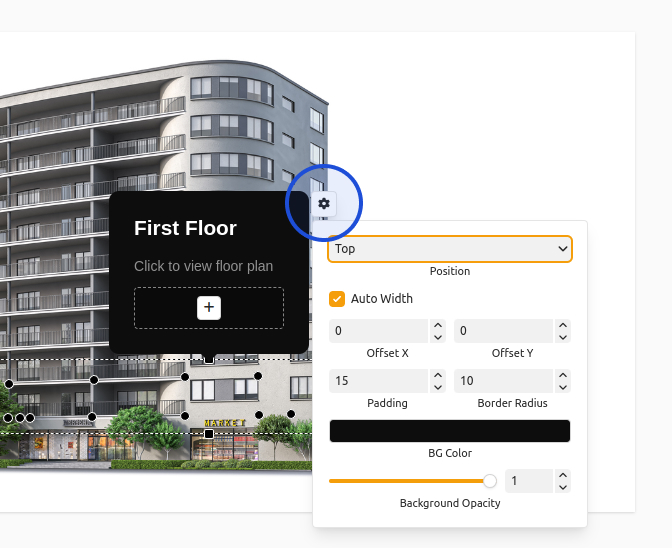
Next, let’s change the tooltip position from “top” to “left”. Click the Settings button on the top-right of the tooltip and change the Position settings to Left.
Finally, let’s copy this tooltip to every other object so we can save some time. Right click the object with the tooltip that we just created and choose “Copy Tooltip Content”. Select all objects, right click and choose “Paste Tooltip Content”. Following the same steps, copy the tooltip styles (because we changed the position from top to left) from our original object to all other object.
An alternative way of editing the settings of many objects is to simply select them and change their settings on the right. Every setting you change will be applied to all objects!
Hit Save.
Setting click action to go to a specific floor
Now we want to make it so clicking a floor will change the artboard to that specific floor.
Select an object and expand the Actions category in its settings:
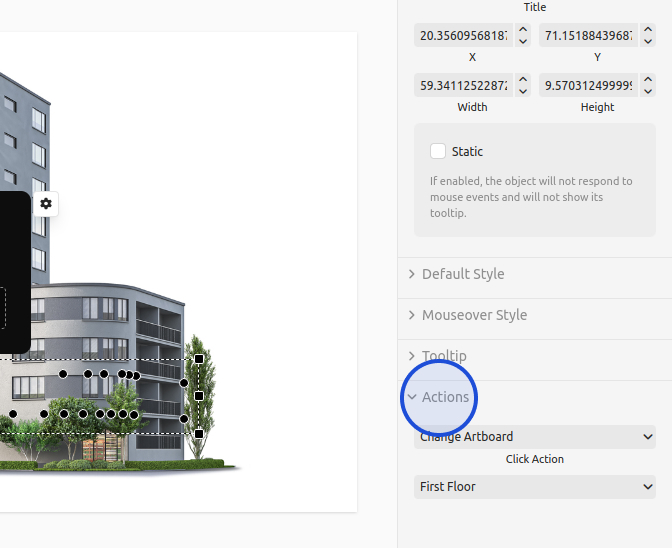
For Click Action choose Change Artboard and select the target artboard from the menu below. That’s all!
Adding an object list
As a final step, let’s add an object list on the right, just like in the example in the beginning of this article.
Open the Settings from the sidebar on the left and expand the Object List category:
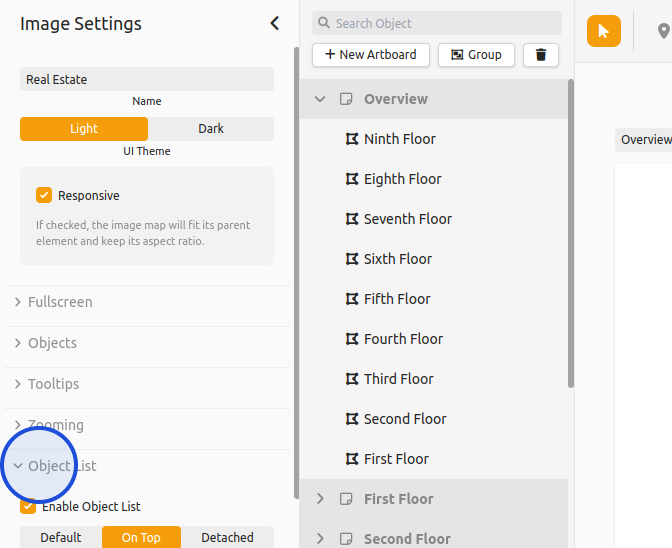
Click Enable Object List and for Menu Style choose “On Top”. We don’t need to have a search box, so disable the Enable Search checkbox.
Adding the glow effect
The Image Interaction plugin has a cool glow effect that is visible when a banner loads on the page.
Go over to the dashboard and look for the settings button on the left column and click it …

Go to Objects and click on Glowing objects. Once this feature is activated you may choose from a variety of effects when it loads. In this example, we have selected the ‘Flash’ effect, which makes this image glow for a few seconds when the page / image loads.

Hit Save.
Final Step: Adding Image to Site
Now for the last and final step. To view your design or image go to your settings, and ensure you have a name for the project. For ease of remembrance, take the same project name and add it into the shortcode. Make sure while doing so, its in lower caps and in place of the space, add a dash – between each word. For example Name: Building view, shortcode name will be ‘building-view’ . Next we need to add this shortcode to a blank page or post in your wordpress website.

For this, firstly go to posts or pages and create a new post.

Once the new post or page is created, hit the plus sign on the top left and look up the shortcode block

Drag this block to the page. Now take the shortcode name you created and add it bwteen square brackets as shown below. In this example the code would be

Hit save and publish your page. You can create mutiple such shortcode blocks in one page and make multiple pages for each shortcode block to display different project images as well.
Conclusion
We are done! We hope this article has helped you get up to speed with Image Interaction Plugin and has demonstrated some of its incredible capabilities.
If you need help using Image Interaction Plugin or to report a bug, please contact us. We always try to respond within 72 hours.